Beadboard paneling paired with cove molding adds traditional architectural detail to interior spaces. Proper installation relies on accurate measurements, secure fastening, and adapting to structural inconsistencies like uneven walls. Following a systematic approach ensures the wood panels and trim align correctly, creating a smooth surface ready for paint.
Required Tools and Materials
A successful paneling project requires specific carpentry tools and dimensional lumber. Having the exact materials on hand prevents interruptions during the installation process.
Tools needed:
- Miter saw
- Brad nailer
- Folding rule or tape measure
- Jigsaw
- Pencil
- Spirit level
Materials needed:
- 70 mm beadboard panels
- 50 mm double-bead cove molding
- 30 mm and 40 mm brad nails
- Wood shims
Step-by-Step Installation Process
Measuring and Cutting the Beadboard
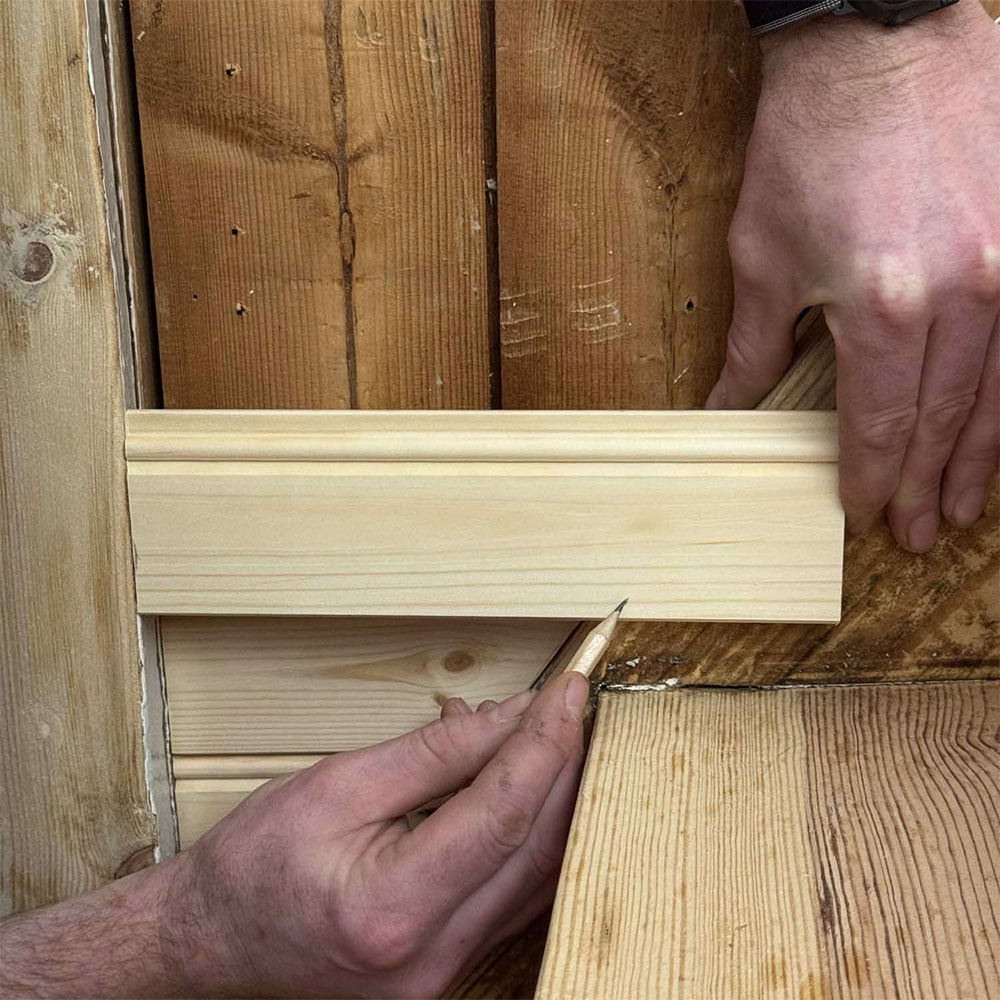
Accurate measurements dictate the success of the installation. Installers mark each piece carefully using a pencil and a folding rule. When working in tight spaces or dealing with difficult angles, cutting the beadboard slightly longer than the exact measurement provides a margin of error. This allows for minor adjustments during the dry fit. A jigsaw easily handles any custom cutouts needed for electrical outlets or structural obstructions.
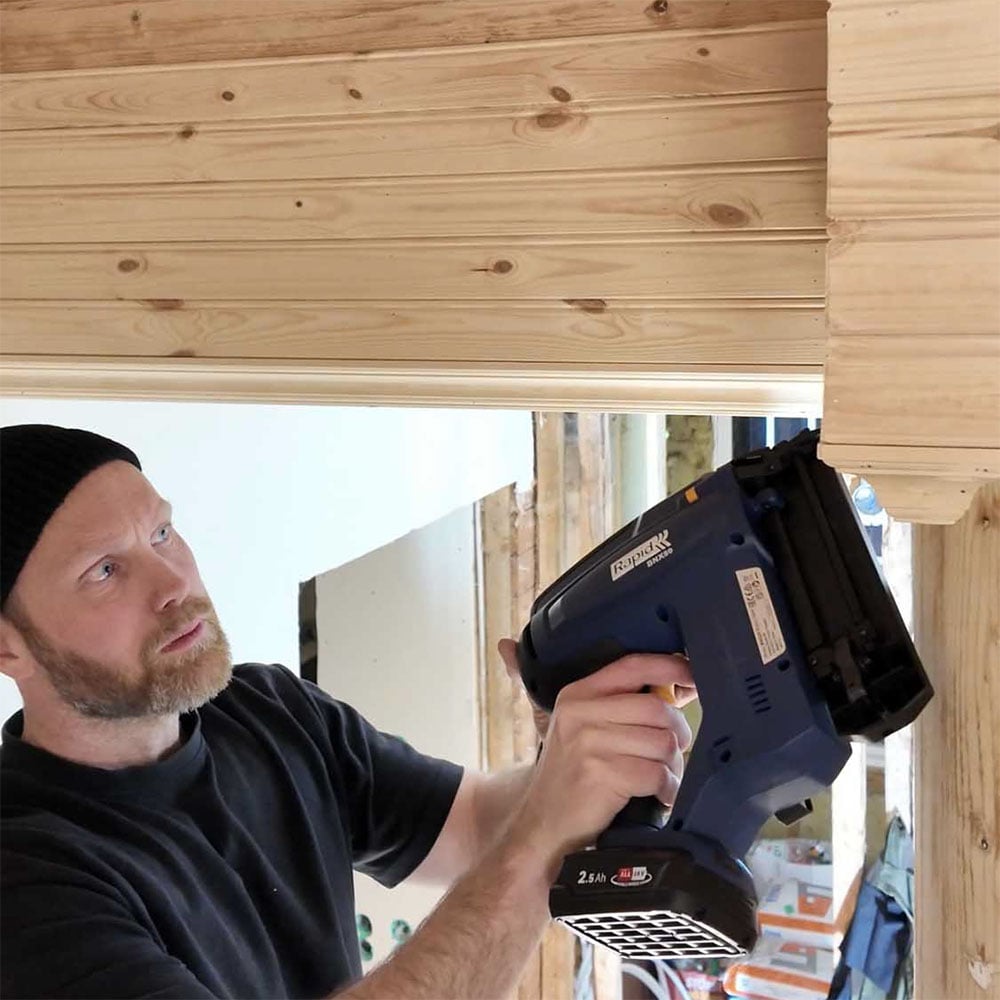
Aligning and Fastening the Panels
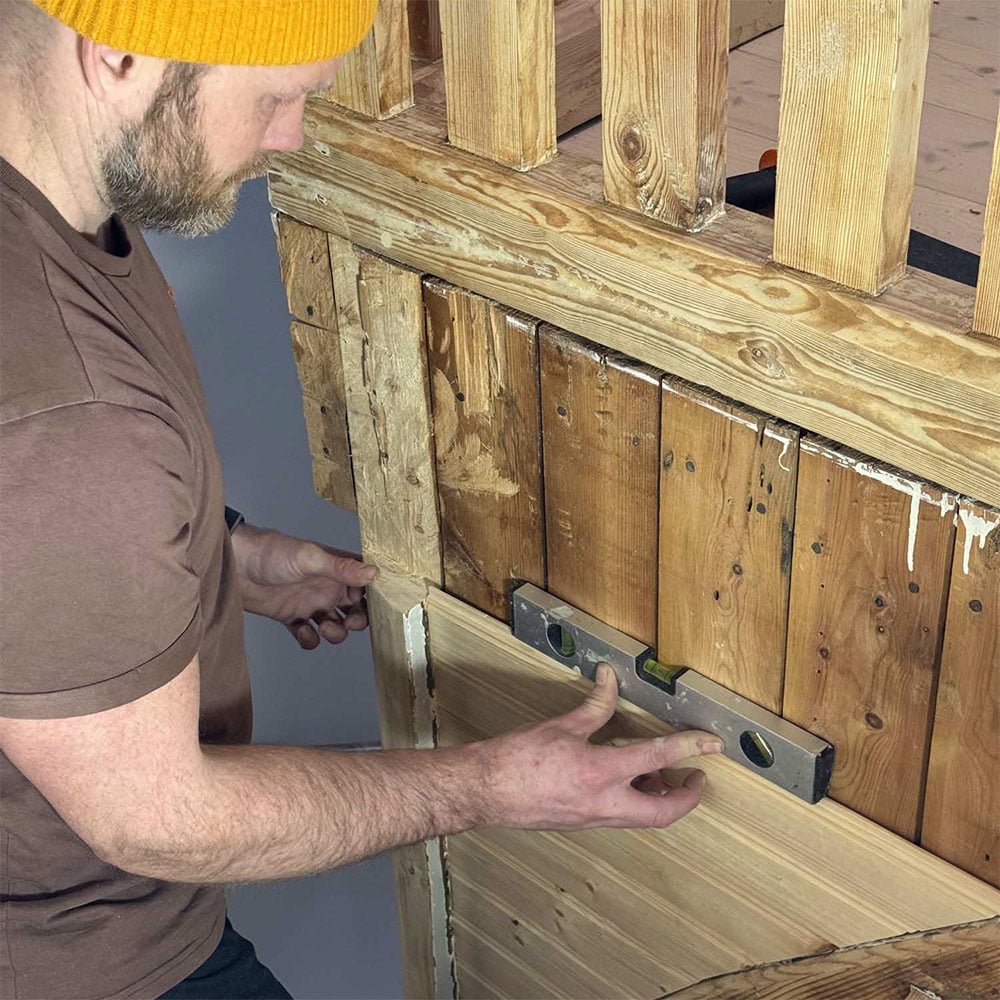
Testing the fit guarantees proper alignment. Placing the beadboard into position and checking it with a spirit level confirms the panel sits perfectly straight. Straight alignment on the first panel is critical, as every subsequent panel locks into it.
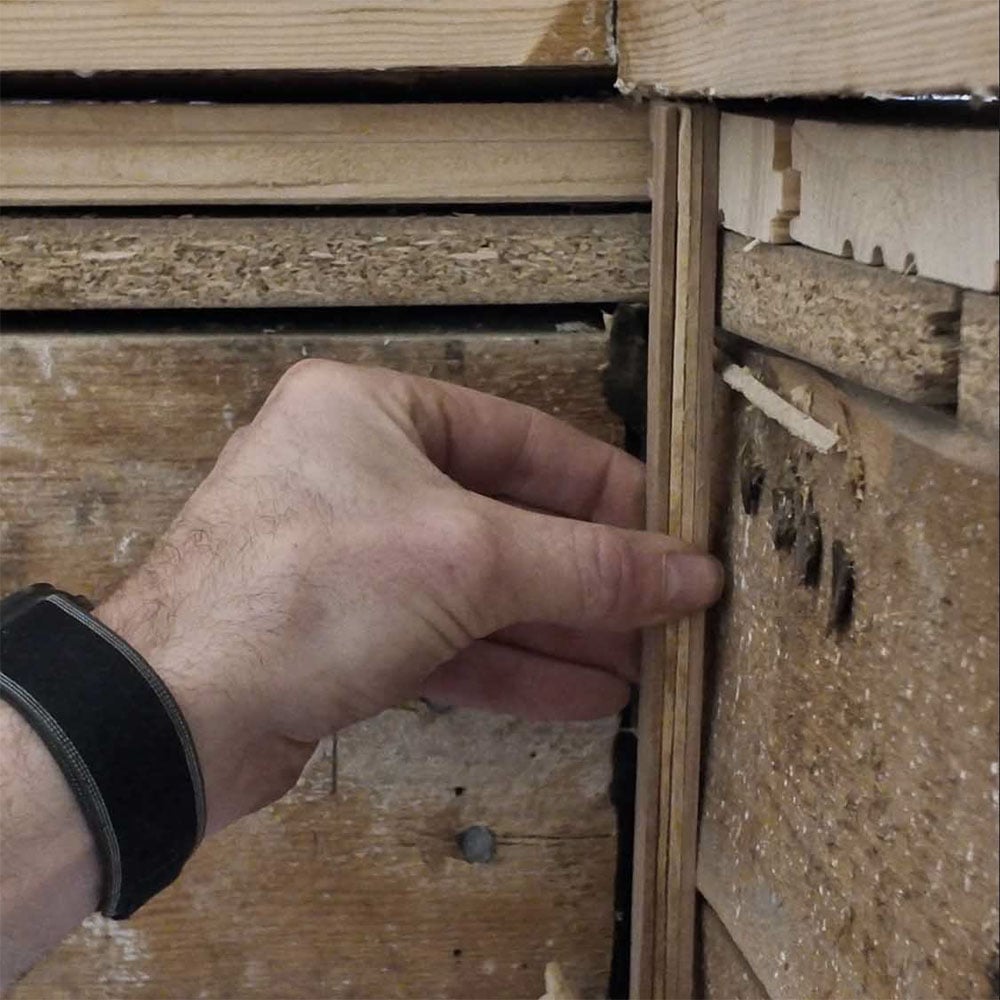
Walls are rarely perfectly flat. If the wall behind the paneling bows or dips, installers insert wood shims to create level mounting points. This prevents the beadboard from warping when nailed down. Once the surface is plumb, a brad nailer secures the wood to the wall. For standard 70 mm beadboard, 30 mm brad nails provide sufficient holding power without penetrating too deeply into the wall cavity.
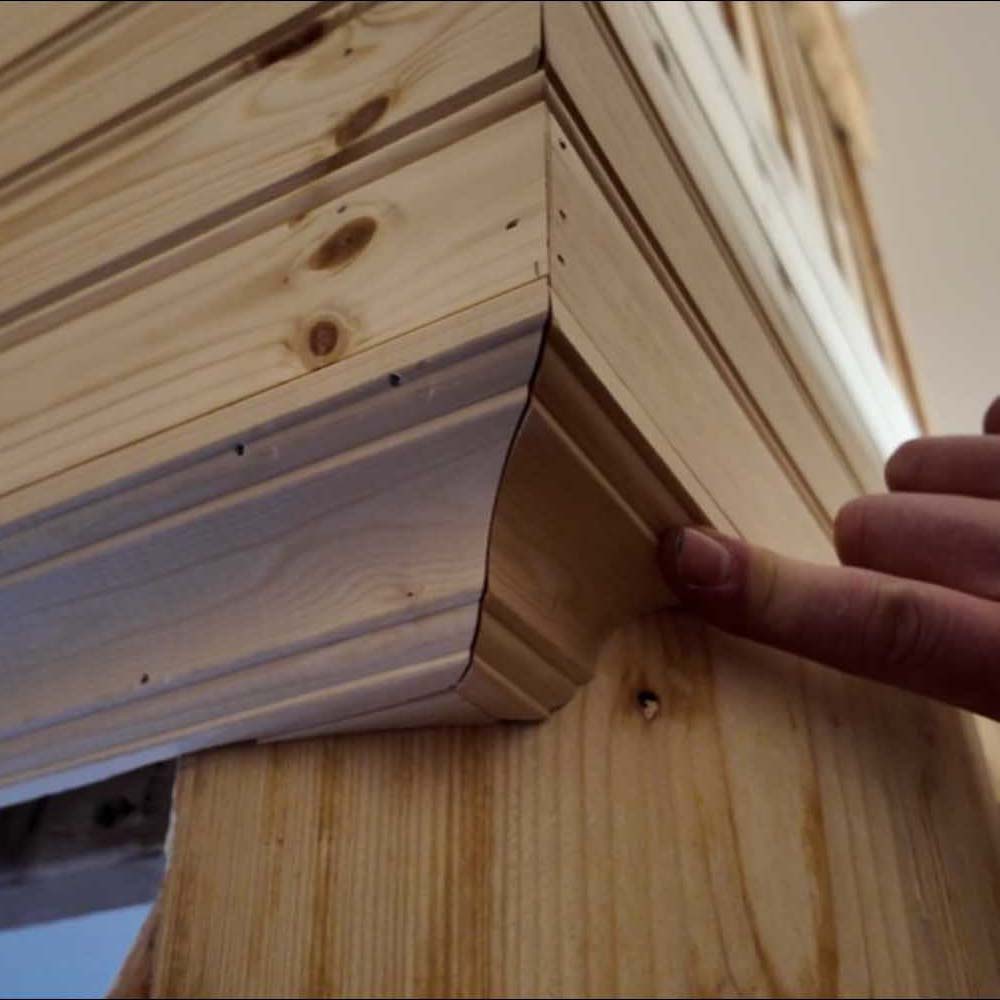
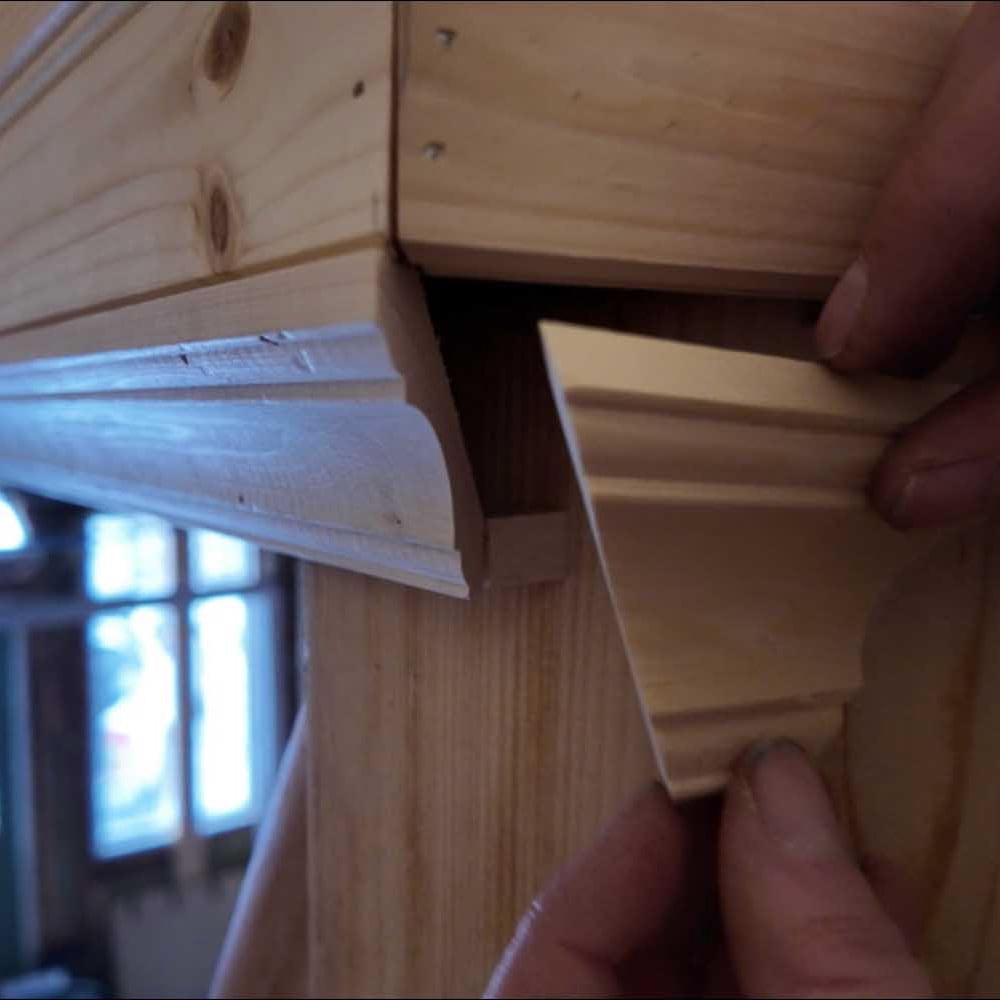
Installing the Cove Molding
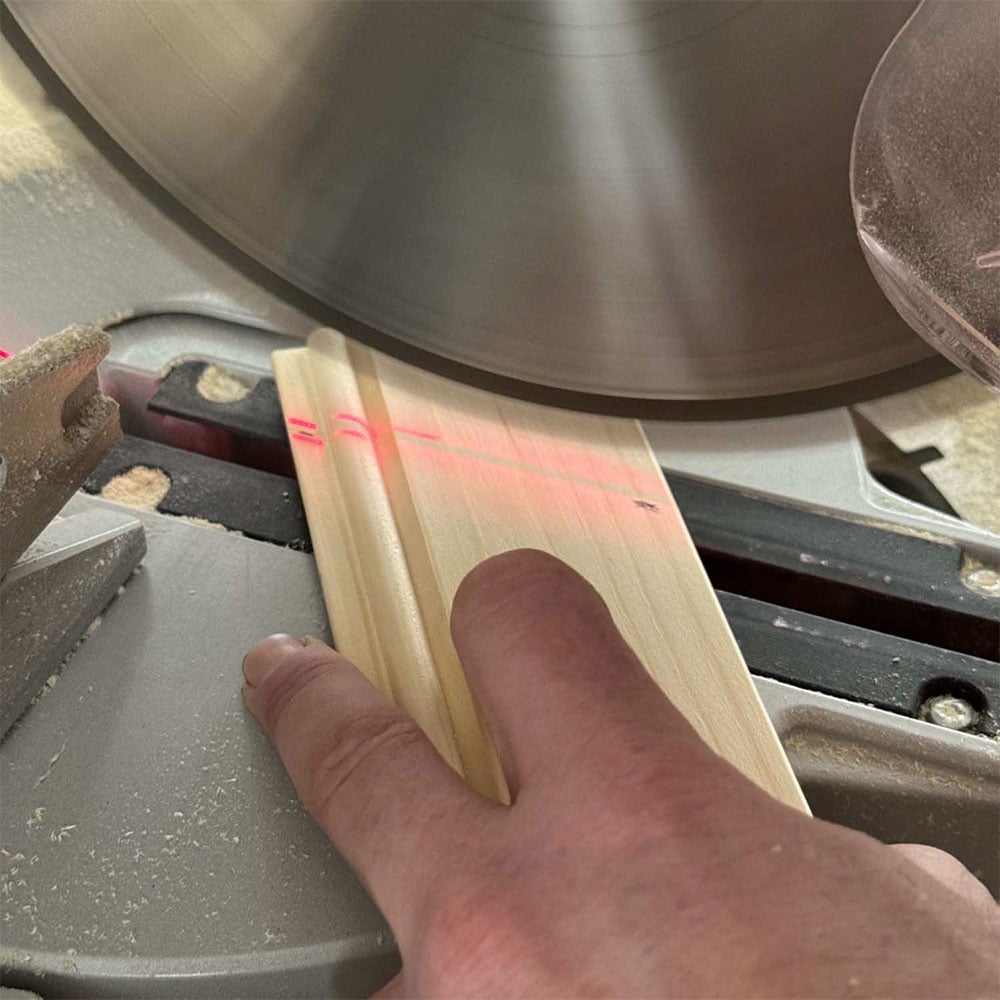
Cove molding bridges the gap between the beadboard and the ceiling or upper wall, hiding the top seam. The 50 mm double-bead molding requires precise angular cuts to form tight corners. Installers use a miter saw to cut the molding at a exact 45-degree angle.
After cutting the angles, the molding is positioned tightly against the ceiling and the beadboard. The brad nailer, loaded with 30 mm or 40 mm nails depending on the required depth, fastens the trim permanently into place.
Final Preparations for Painting
Once the beadboard and cove molding are fully secured, the carpentry phase is complete. The wood surfaces, nail holes, and joints are now ready for wood filler, primer, and a final coat of paint.
FAQ
What size brad nails work best for beadboard installation?
For standard 70 mm beadboard, 30 mm brad nails provide a secure hold. Thicker materials, or areas requiring deep shimming due to wall irregularities, often require 40 mm nails to reach the studs.
How is wood paneling installed on an uneven wall?
Installers place small wood shims behind the panels at the fastening points. This builds up the low spots, creating a flat, plumb mounting surface that prevents the beadboard from bending or bowing when nailed.
What angle is required for cutting cove molding corners?
Standard 90-degree room corners require cove molding to be cut at exactly 45 degrees using a miter saw. This creates a clean, flush joint where the two pieces of trim meet.
Key Takeaways
- Measure panels precisely, leaving slight excess length for tight or difficult spots.
- Use a spirit level to verify straight lines before fastening any materials.
- Shim uneven walls with wood scraps to maintain a flat, plumb mounting surface.
- Fasten panels and molding using a brad nailer loaded with 30 mm and 40 mm nails.
- Miter cove molding at 45-degree angles to create clean corner joints.

