How to Make a DIY Christmas Star – Step-by-Step Guide
30.11.2025

How to Make a DIY Christmas Star – Step-by-Step Guide

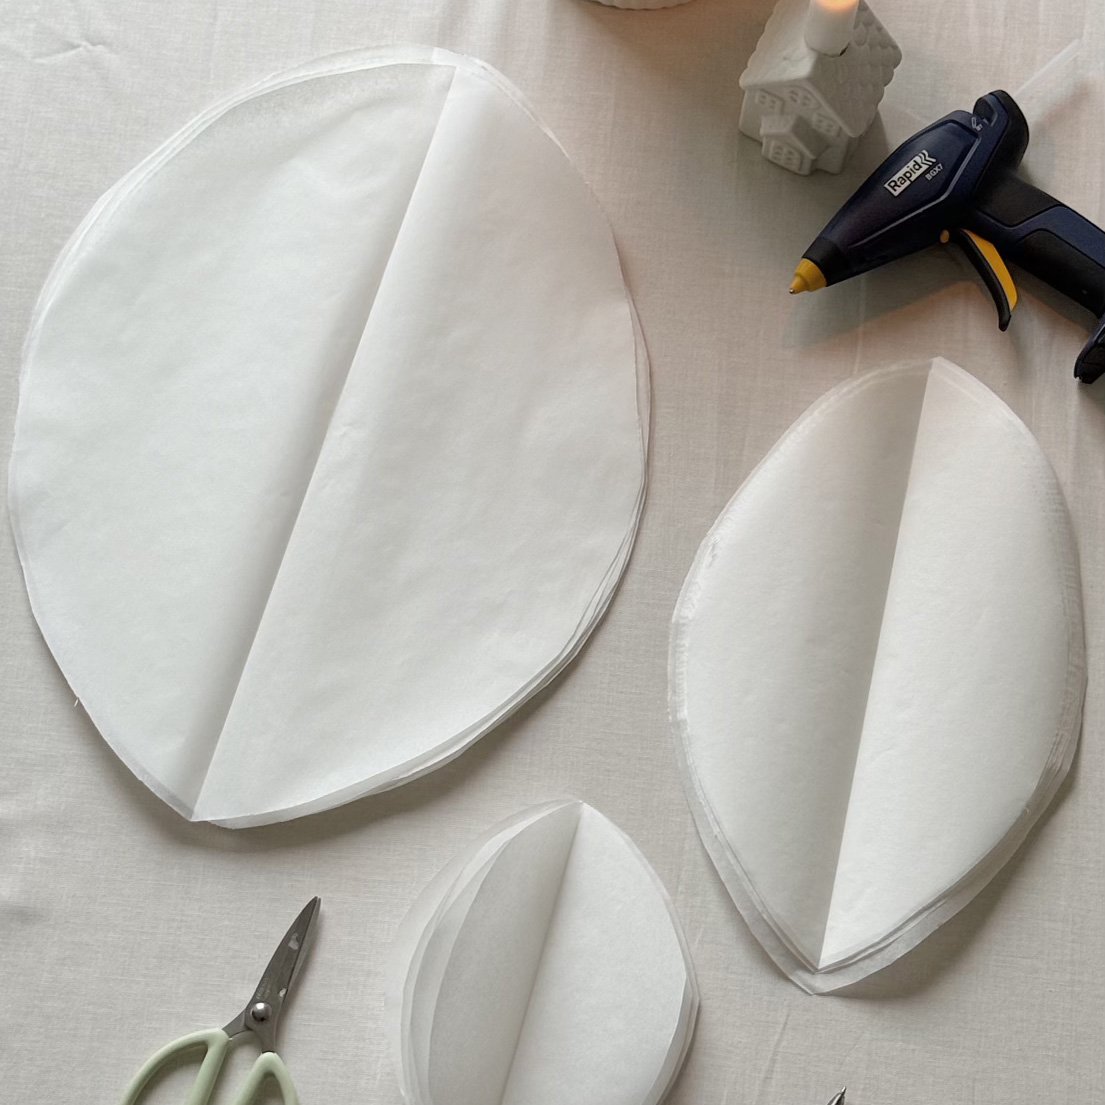
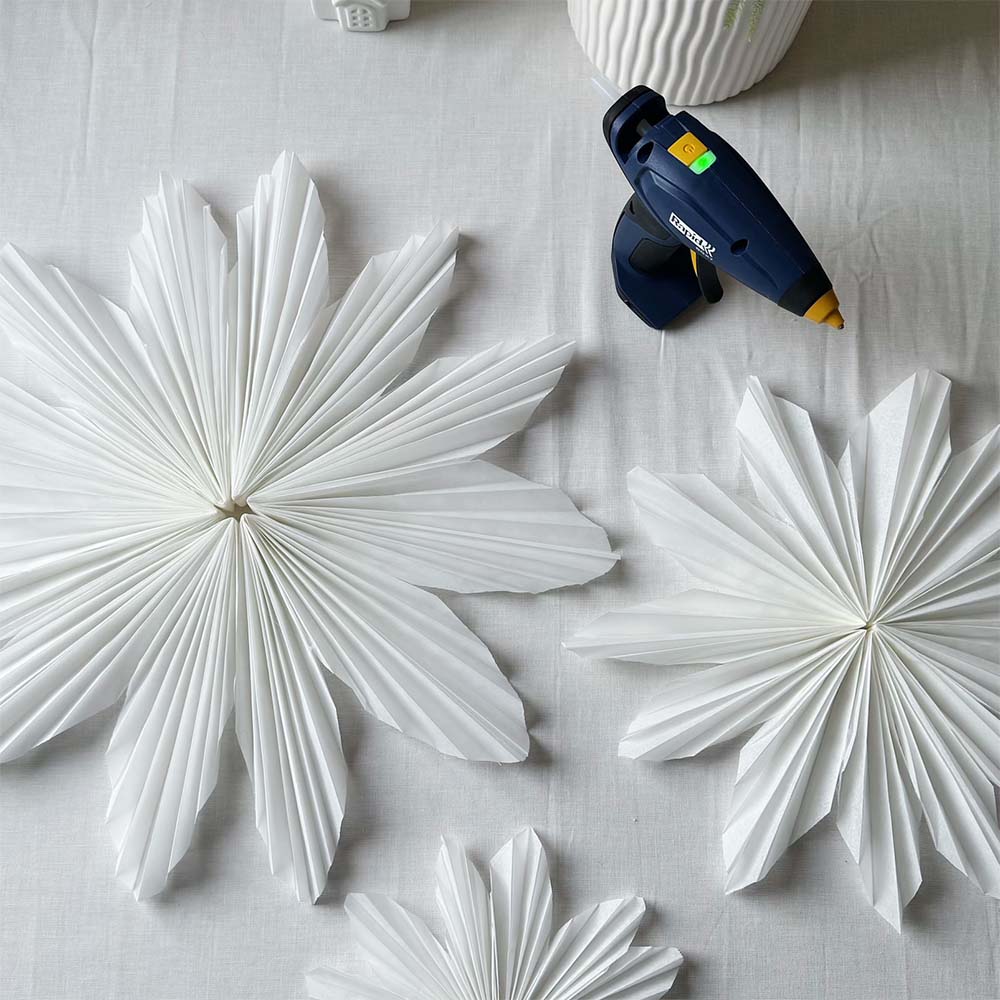
Creating your own Christmas star is a fun, creative, and budget-friendly craft that adds a warm, handmade touch to your holiday décor. With just baking paper, a glue gun, and a few simple folds, you can build a beautiful layered star that looks stunning in any window. This guide walks you through each step—clear, simple, and perfect for both beginners and experienced crafters.

Step-by-step guide

First, we will start by cutting out all 18 pieces. We will cut out 6 pieces of each size, where each size will form one star. We begin with the large pieces.

Large back star:

Start by taking out 6 sheets of baking paper.

  • Make sure the sheets are stacked neatly on top of each other, edges aligned on all sides.
  • Fold all 6 sheets in half lengthwise (along the long side).
  • Draw a half-moon shape with the folded edge on the closed side of the half-moon.
  • Cut along your drawn line through all 6 sheets.


Now you have 6 identical large pieces.

Middle star:

  • Take 3 new sheets, stack them, and fold them in the middle of the short side.
  • Then fold them again across the middle of the long side.
  • Draw a half-moon with the folded edge on the closed side of the shape.
  • Cut along your line through all 3 sheets.


You now have 6 new pieces.

Smallest star:

  • Take 2 sheets and place them on top of each other.
  • First fold them in half lengthwise.
  • Then fold in half along the short side.
  • Finally, fold in half again along the long side.
  • Draw a half-moon with the folded edge toward the closed side of the shape.
  • Cut along your line through both sheets at once.


You now have 8 pieces, but you will only use 6. Save the 2 extra pieces for a later step.

Now you have 18 pieces total, 6 of each size.

Folding the sheets

  • Next, fold all pieces like an accordion.
  • We recommend folding all 6 sheets of the same size at the same time so every piece becomes identical. Start with the small pieces, then continue with the others.
  • When you have 6 identically folded accordion pieces of each size, fold each accordion in half.
  • Now it’s time to glue each piece into a small heart shape.
  • Place glue on the inside of the folded accordion, then close it and let it dry.
  • Repeat this for all 18 pieces.


Assembling each star:

  • Start with the large star. Place glue along the outside edge of one heart-shaped piece and press another piece on top, edge to edge and bottom to bottom.
  • Glue all 6 pieces together in this way.
  • When all pieces are attached, unfold them and glue the ends together to form a star.
  • Repeat the same process for the medium star and the small star.
  • If the stars feel unstable, you can add a drop of glue in the center of each one for extra support.

Finishing pieces:

  • Take the two leftover pieces from earlier.
  • Cut a circle approx. 15 cm in diameter from one piece.
  • Cut a circle approx. 10 cm in diameter from the other.
  • The larger circle will be glued onto the large star, and the smaller circle onto the medium star.
  • When the larger circle is attached, apply a generous amount of glue on top of it and glue the medium star on top.
  • Then glue the smaller circle onto the medium star, add more glue on top of that circle, and attach the smallest star on top.


Final touches:

If you want, glue a bead in the center as a decorative detail.
You can also attach a silk ribbon to hang the star—simply glue both ends of the ribbon to the backside of your star.

To make a brown star, or a star with mixed colors, simply replace all or some of the baking paper sheets with brown baking paper.